
Author: MaxL_1023
Inflicting Module Damage – Internal Modules
Internal modules are contained within the main body of the tank. Unlike external modules an AP shell needs to penetrate the surface armor before dealing module damage. HE shells can damage them without penetrating the armor, however they usually inflict less damage due to the majority being absorbed. I am considering crew members to be internal modules – except for a few open-topped TDs the crew are represented by hitboxes entirely within the tank. Internal modules are generally difficult to reliably target – their location varies for each vehicle and generally can’t be determined in battle. However, enough general rules exist to justify studying this area – being able to target engines, ammo racks or gunners especially has a debilitating effect on the enemy tank. I will therefore explain each internal module, where it usually is and what happens when you damage or destroy it. First up: Crew.
The Commander
The Commander is common to every vehicle in the game. He is almost always located directly under the commander’s cupola. From the front this will appear to be behind the turret face. As it is usually difficult to penetrate the front turret of a vehicle the cupola is your best bet. For tanks with two turret cupolas the second one is usually the gunner, so just pick the easiest one to hit. Usually, the larger cupola houses the commander. Wounding or Killing the Commander has the same effect – the victim loses the majority (~50%) of their view range, loses all relevant skills and perks (including 6th sense until they move it to the radio operator) and also loses the 10% commander bonus to the rest of their crew. Therefore, a tank without a commander is blind, debilitated and won’t know when it is spotted. Therefore, if you have the shot it is generally worth it to try for the commander. Note that the commander has a ~55% chance to make a saving throw resulting in pure HP damage. Only target the commander if you are sure you will hit and penetrate with your shot. Otherwise, try something else.
The Gunner
The Gunner is common to almost all vehicles – a few have the role merged with another crew member. Either way, the role exists and can be eliminated by well-aimed fire. On most vehicles, the Gunner is located behind the front turret to one side of the gun. If the turret has a commander’s cupola, the gunner is almost always on the opposite side. For tanks with two cupolas, the gunner is generally under the smaller of the two. Wounding or killing the Gunner massively reduces the accuracy and increases the aim time of the enemy tank – it is worse than having a damaged gun and makes it essentially impossible hit an enemy tank at all but facehug range. As with the Commander, killing the Gunner results in the loss of all attached skills and perks. Losing the Gunner is by far the worst crew death – it essentially makes your gun useless. Therefore, the majority of players will use a medkit on their Gunner before even the Commander. Like the Commander, the Gunner has a chance to save the damaged inflicted. Therefore, only try to hit the gunner if you are nearly sure of his location and expect to both hit and penetrate. Otherwise it is better to just shoot where you are most likely to deal HP damage.
The Driver
The Driver is generally located behind the upper front plate. It is difficult to figure out where exactly the Driver is located. Generally, the Driver is positioned directly behind any slit or hatch in the upper hull, and is underneath any periscope or viewport along the upper edge of the glacis. If there are two viewports then it is basically a dice roll. The driver is usually behind the larger of the viewports (or the one with the hatch) if a discernible difference exists. Wounding or killing the driver results in a decrease in hull traverse and effective engine power. Essentially, the enemy tank will move significantly slower in all directions and on any terrain. A Driver kill is therefore most valuable when the victim is a medium or light tank – heavies are not effected to the same degree as they do not rely on mobility to the same extent. However, I do not recommend targeting the driver unless he is behind a weakspot. Otherwise, you end up trying to penetrate the upper hull. As this is often one of the strongest areas of a vehicle, you are more likely to fail to penetrate. Unless it is a KV or IS series tank a driver shot is not recommended. There is usually a better spot to shoot.
The Radio Operator
Don’t even bother. Unless the enemy tank is separated by several hundred meters from the nearest ally killing the Radio Operator will have no effect. If the separation exists the enemy is usually dead anyways. He might as well be studying probability curves for the sazkove kancelare cr rather than operating his equipment, given how little impact he has on close-quarters combat. The humorous exception is “R2D2″ on the KV-5 – this is the Radioman’s cupola and happens to be a major frontal weakspot. If you are aiming for the radio operator then you probably have better things to do.
The Loader
The Loader is almost always positioned directly behind the gunner. Wounding or Killing the loader will double the reload time (halving the rate of fire) of the effected vehicle. This is a significant effect, however the gun handling and mobility of the enemy tank are unaffected. Therefore, use of cover can partially negate the loss of DPM. I do not recommend trying for the loader – in most cases when a reliable shot exists you are better off aiming for the roadwheel, engine or ammo rack.
Overall, only the Commander and Gunner are usually worth shooting and only then through their particular cupola weakspot. I do not recommend trying for crew damage unless you are very confident in your shell and aim. You are better off trying for a more reliable shot – one where a fewer random dice roles are involved. Internal modules all have that additional saving throw which often negates your aim and prevents module damage. However, there are still internal components which are worth aiming for due to the potential side effects. I will therefore review the rest of the internal modules.
The Turret Ring
The turret ring is located at the base of the turret. It is visible on the surface on some tanks (Generally American Tanks) but is usually hidden underneath the hull. Damaging the turret ring will half the turret rotation speed – destroying it will stop the turret entirely. This basically makes it impossible for the enemy to aim unless they can turn their hull with the required degree of precision. I do not recommend aiming here unless you are trying for a shot-trap style shot – usually the turret ring is about as hard as the front turret or requires penetration of the turret itself. Therefore, it is too difficult a shot for most situations.
The Fuel Tank
The fuel tanks are usually located to either side of the engine and often forward underneath the side hull. They are most easily hit by shots slightly above the tracks behind the turret. Damaging the fuel tank has no direct effect on vehicle performance, however it drastically increases the chance of an engine hit starting a fire. Destroying the fuel tank immediately sets the enemy tank on fire regardless of the engine status. A fire inflicts HP and Module damage at a rate dependent on the affected vehicle type. Fires continue to burn for a variable time dependent on the vehicle, the crew’s firefighting skill, the use of an extinguisher as well as random chance. I do highly recommend aiming for the fuel tanks when the shot is available – as they are usually located behind the side hull you are likely to penetrate. As well, a shot which misses the fuel tank often has a good chance of hitting the engine or ammo rack. Russian Mediums are most vulnerable to this – their fuel tanks can be hit through the front hull as well as the sides. When the enemy does not carry a fire extinguisher a successful fuel tank hit often results in two or three times standard shell damage after the fire is finally put out.
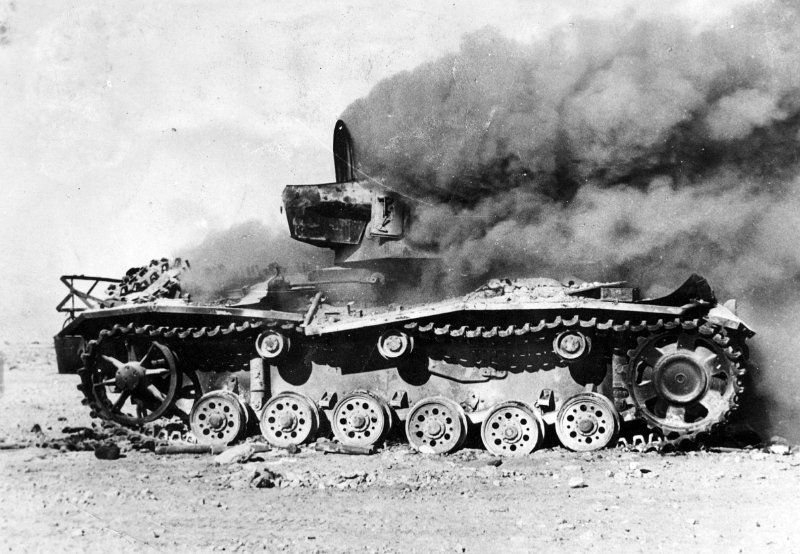
Marshmallows anyone?
The Engine/Transmission
The engine is located at the back of most tanks (if the turret is rear mounted it is in the middle). It is most easily hit by shooting the center of the rear hull or the back third of the side hull roughly level with the top of the tracks. Damaging the engine halves the available horsepower, basically making the tank move at half speed. Destroying the engine immobilizes the tank in the same manner as detracking. Engine damage takes considerably longer for the crew to repair, therefore a shot here can immobilize a tank for up to 30 seconds. As well, every engine hit has a chance (dependent on the engine) to set the tank on fire in the same manner as fuel tank damage. This is usually between 10 and 20%, making engine fires uncommon but not rare. I recommend targeting the engine whenever you see the rear of the tank – basically aim here as opposed to the turret rear. The fire chance and mobility loss makes it well worth it. Transmission hits are identical to engine hits except they do not cause fires. This is a feature of some German Tanks (E-75 and E-100 mainly). The transmission is usually behind the lower front hull and is a harder shot than the engine. However, it is still worth trying for as the lower plate is usually also a weakspot. If you can though, the engine itself is a better target.
The Ammunition Rack
The ammunition rack is the most difficult module to damage – it has a 73% chance of negating any hit. However, when you do hit this area the results are spectacular. Damaging the ammunition rack doubles the enemy’s reload time. If you manage to completely destroy the ammunition rack this happens:
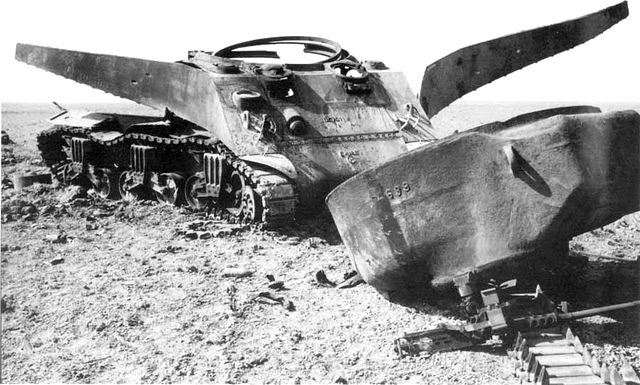
I think that used to be a tank…
Destroying the ammunition rack immediately destroys the vehicle regardless of HP, crew skill or vehicle type. Therefore, if possible you really want to aim there. The ammunition rack is most often behind the front half of the side hull on Russian/Chinese tanks and the center of the side hull on other vehicles. Some vehicles also store ammunition in the turret – most often the rear half. I will note that it is difficult to completely destroy an ammunition rack unless it is already damaged – usually it has too much HP for all but large caliber shells. As a general rule a 750 damage shell can ammo-rack a tier 10 tank, a 490 damage shell a tier 8 tank and a 390 damage shell a tier 6 tank. If you have a small caliber gun it will take multiple shots and is therefore unlikely that you will completely destroy the enemy by detonation. However, the reload effect along makes targeting this area worth the aim time. I would prioritize an ammo rack shot over any other internal module – if you have it take it.
Summary and Conclusion
There will always be situations where pure HP damage is simply not possible or sufficient. Module Targeting allows you to debilitate an enemy tank without needing to penetrate thick armor, or for you to disable an enemy tank with a single well placed shell. It is vital that you get all you can out of your shells. An ammo rack explosion, well timed detrack or a fuel tank fire can on its own change the course of the battle. Even if you can’t inflict the damage yourself by reducing the enemy’s capability to fight you are helping your team to win.
In Summary:
1.If you are unable to penetrate an enemy tank target external modules.
2.Damaging external modules inflicts negative effects on the enemy vehicle which your team can then exploit.
3.If at all possible, inflict HP damage through the tracks to both damage and immobilize the enemy.
4.Internal modules are more difficult to hit with random chance playing a large role.
5.Targeting Crew is only viable if they are positioned under a weakspot.
6.Shoot the Fuel Tank, Engine or Ammo Rack whenever you can.
In conclusion, Module Targeting can be applied in both an additive and multiplicative fashion to increase your effect on the battle. Practice being able to both detrack and damage enemy tanks. Use common sense to figure out where engines, fuel tanks and ammunition storage is likely to be located – is it not practical to memorize everything. Implementing Module Targeting sets you on the path to higher level play. You are no longer merely trying to deal HP damage to the enemy – you are seeking to destroy his ability to fight in any way possible. The Target Selection guide teaches you how to pick which tank you shoot. The Weakspots guide helps you damage that tank when it is heavily armored. Now, you can select which weakspots are most likely to involve dealing additional damage, debilitating status effects or can try for specific effects on lightly armored enemies. You are now a greater threat on the battlefield regardless of your tier. If you internalize what you have read you will be well on your way to dominating games.
And that’s it. I hope you enjoyed the guide – would you like more from the same source? Let me know. Also, at this point, MaxL also wanted me to link his Patreon site, where you can support him in making more guides like this, if you liked it. Until next time. -SS
First (lololo)
Nice guide mate, really detailed.
Very good guide thanks MaxL_1023
Just like the previous part, a very nice read. Many thanks for the guide, I wish it existed when I was still learning the ropes. :)
“I think that used to be a tank…”
Now it’s an airplane! Look at those wings!
UNFAIR!
Dont know about you all – but I shoot to damage.
Unless I can see sides or rear – then aim for fuel tanks or engine.
When I can, I shoot at different spots to kill multiple modules lel
I thought you stop playing wot, didn’t you ?
I did.
Want damage modules? KV-2.
AMX 13 90 coming behind somebody is still the best to damage modules.
I’d like to repost this from part I if ClassicFrog is still reading. Here’s a video that explains what I meant:
https://www.youtube.com/watch?v=jiLTocmJEtM
The whole video is pretty interesting (Did you know that tracks don’t repair until they are actually broken?) but the part I’m talking about is around 4:15.
You said that the Commander has a 45% chance to be injured (saving throw of 55%), but isn’t it 33% (saving throw of 67%) vs AP and 10% (90% saving throw) vs HE? That’s how I always learned it.
Nice guide! Would be interested in the next as well.
I think the author has the commander and the loader mixed up. The gunner is almost always up front, up against the gun mantlet. You can usually see which side by looking closely where on the mantlet the gun optics come out. The commander in most tanks sits behind the gunner, both of them on one side of the gun. The loader sits somewhere on the other side of the gun in the turret. In real tanks this gives the loader the space he needs to actually grab and move around shells.
An exception to this is tanks with two loaders, like is-7. These usually have the commander and gunner on opposite sides of the gun, and behind them two loaders, one on each side of the gun.
thx for part 2! lots of good info but presented in an easy-to-understand fashion. well done! i can become a Unicorn now!
ALWAYS be yourself…
unless you can be a Unicorn…
then, be a Unicorn! :)
Pingback: Guide: Module Targeting – Part II (Internal Modules) | For the Record - Tank World News